When the printing filaments are almost used up, or you want to change to another color, or for other equipment maintenance purposes, you will need to replace the filaments. To change a spool, you’ll unload the current one first, then load a new one. Here's a detailed step-by-step guide for replacing filaments on your printer. You can change filament at any time — before or during printing.
¶ Changing Filament
¶ Step 1 Unloading Filament
When replacing the filament with a different color, performing maintenance, or if you no longer wish to print models, unloading filament is necessary.
 |
 |
 |
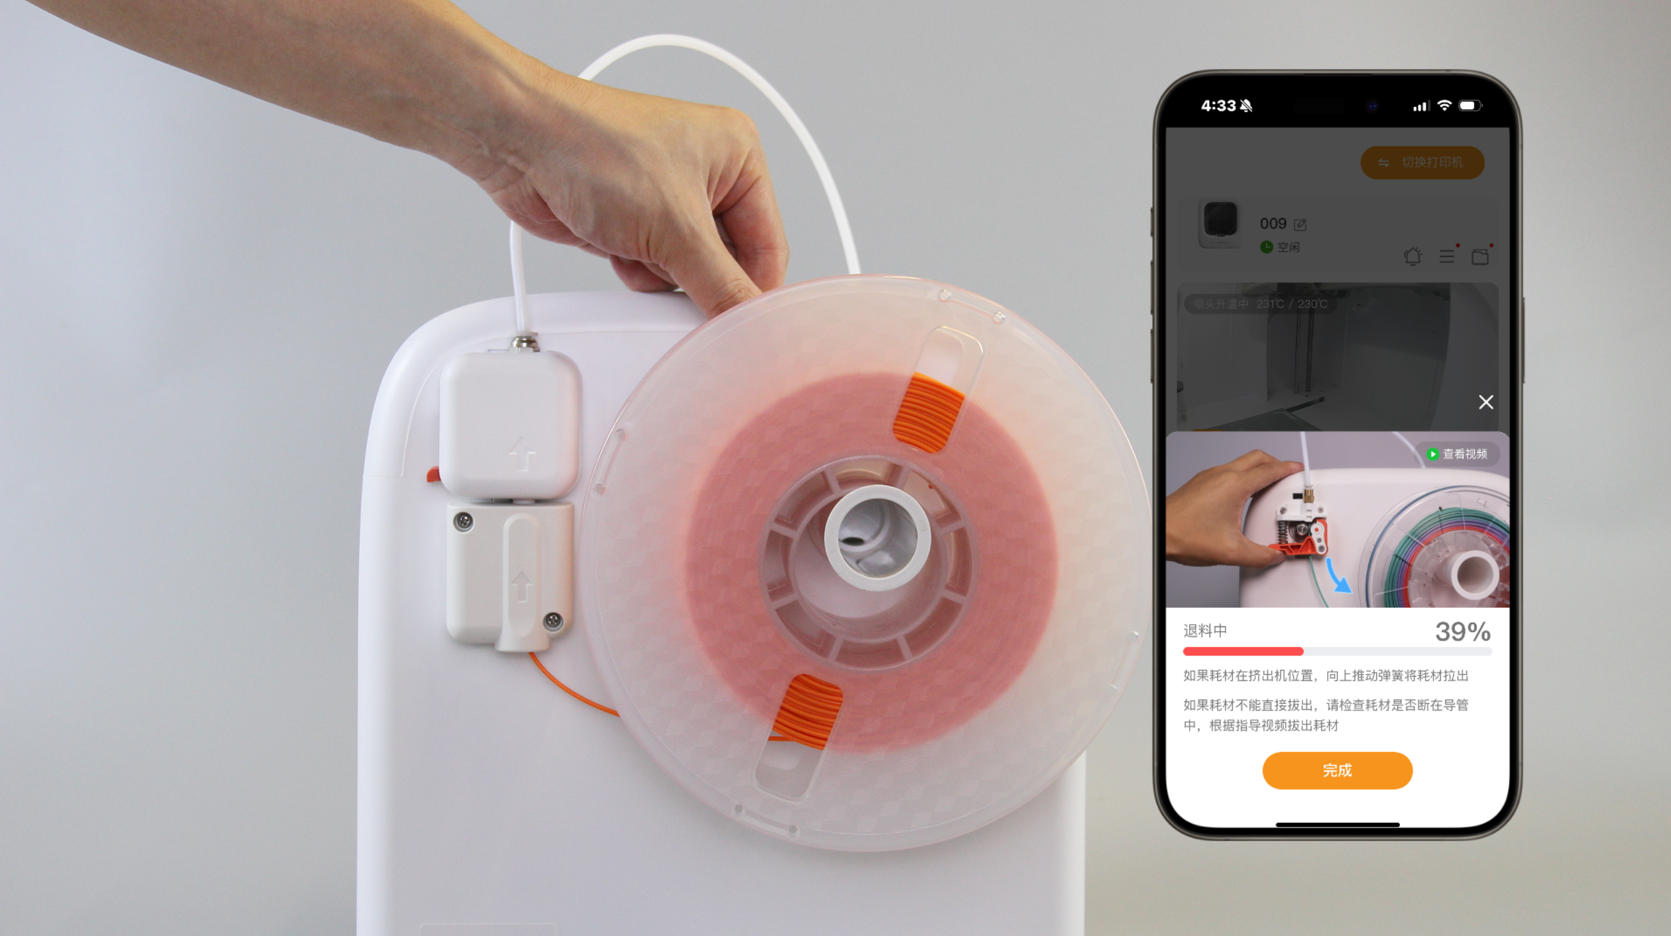
| 1. Connect the X-MAKER JOY AI+ to XMAKER app. | 2. In the XMAKER app-PRINTER, tap Retract filament to unload filament. | 3. Wait for the nozzle to heat up to the target temperature. The indicator light will flash from blue to red. |
 |
 |
 |
| 4. After heating, the unloading will start automatically. The extruder will retract the filament. | 5. During unloading, you can rotate the spool to arrange the filament. | 6. Once unloading is complete, remove the extruder cover. |
 |
 |
 |
| 7. Push the spring up, and pull out the filament. | 8. Insert the tip of the filament into the hole on the side of the spool to prevent tangling. | 9. Remove the spool. Unloading is complete. |
¶ Step 2 Loading Filament
Before printing for the first time, or when replacing the filament with a different color, or performing maintenance, filament loading is required. Here are the steps.
|
 |
 |
|
| 1. Place the new spool onto the holder. Make sure the spool is turned clockwise. Remove the extruder cover. | 2. Use pliers to cut the filament at a 45 ° angle. | 3. Straighten the tip. |
 |
 |
 |
| 4. Push the spring up and hold it, the insert the filament and seed it into the tube (about 3-5cm). | 5. Put the cover back. | 6. In the app, connect the printer, go to Printer, and tap Install filament. The nozzle will return to it’s position. |
|
|
 |
 |
| 7. The nozzle is heating. | 8. After reaching the target temperature, loading will start automatically. Soon, filament will flow out of the nozzle. The indicator light will flash blue. | 9. When loading is complete, use pliers to cut the filament extruded from the nozzle. Keep the print platform clean. Now filament replacement is complete. |
¶ Changing Filament During Printing
¶ Step 1 Pausing Printing and Unloading Filament
When the printer is printing, pause the print first and then unload filament.
 |
 |
|
| 1. When the printer is printing, pause the current print. | 2. Tap Retract Filament. The filament will be retracted automatically. | 3. Pull out the filament end. |
¶ Step 2 Loading Filament and Resuming Printing
After pulling out of the filament, install and load the new filament and tap Continue.
 |
|
|
| 1. Place the new spool onto the holder. Make sure the spool is turned clockwise. | 2. Use pliers to cut the filament at a 45 ° angle. | 3. Straighten the tip. |
|
|
|
 |
| 4. Push the spring up and hold it, then insert the filament and send it into the tube (about 3-5cm). | 5. Put the cover back. | 6. In the app, tap Install filament. The filament will be extruded. |
 |
|
|
| 7. Once the loading is complete, cut off the extra filament extruded from the nozzle. (Caution: hot) | 8. In the app, tap Continue to resume printing. Now filament replacement is complete. |
If there are any other questions, please contact us directly through service@aoseed.com.