X-MAKER printers are rigorously tested for printing before they leave the factory and can print right out of the packaging without the need for calibration and leveling. If the printhead becomes inaccurate due to transportation or other reasons, resulting in warping and displacement of the model, you can refer to the following steps to calibrate and level the printer and print again.
¶ Calibration
Calibration of the 3D printer involves adjusting the initial distance between the nozzle and the print bed to ensure that the filament adheres better to the bed. This step is essential before leveling.
 |
 |
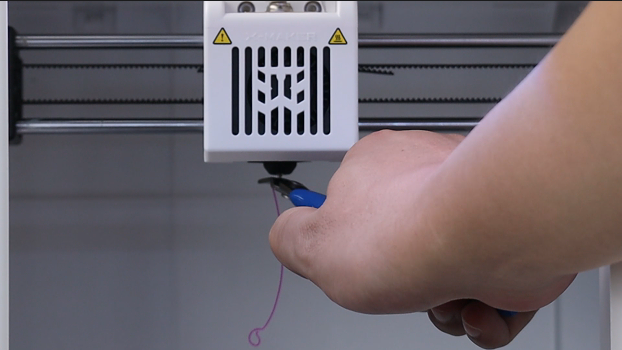 |
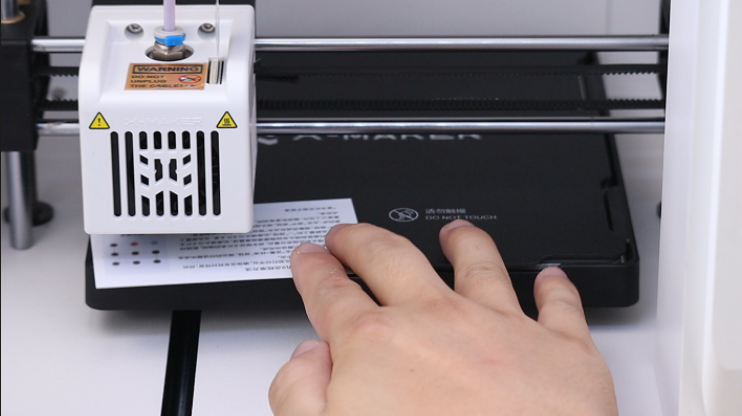
| 1. If the filament does not stick to the bed during printing, or the nozzle rubs against the bed and does not extrude the filament, the printer needs calibration. | 2. Cancel the printing and wait for the nozzle to cool down below 45°C. | 3. Use pliers to cut off the residual filament from the nozzle, and ensure that the print bed is clean and flat. |
 |
 |
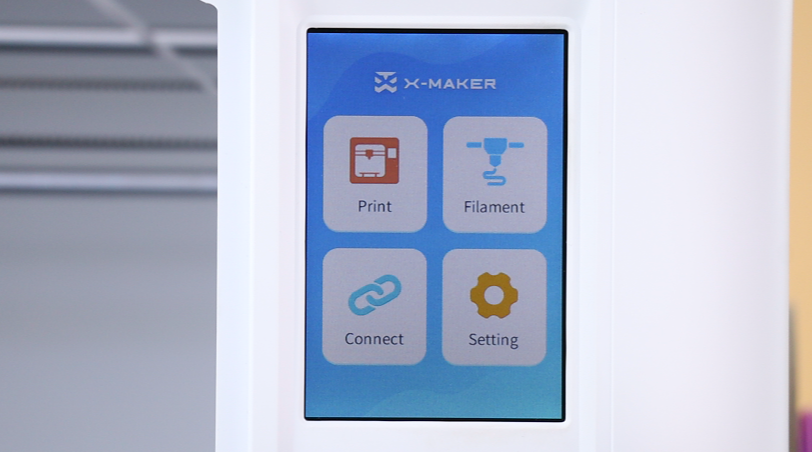 |
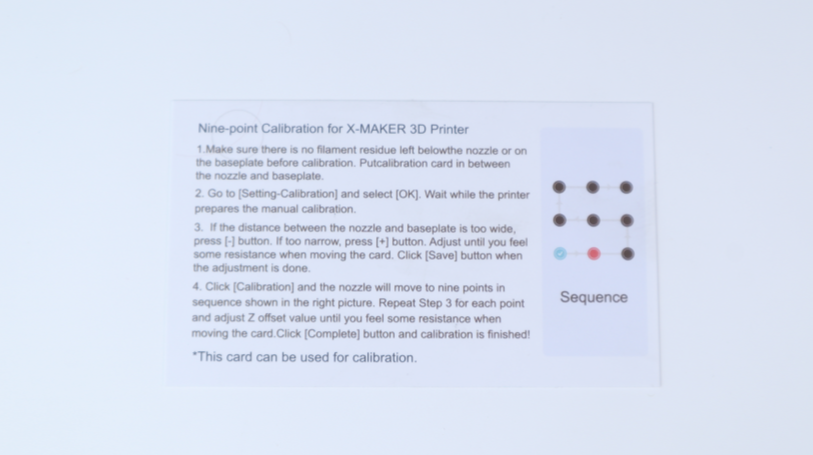
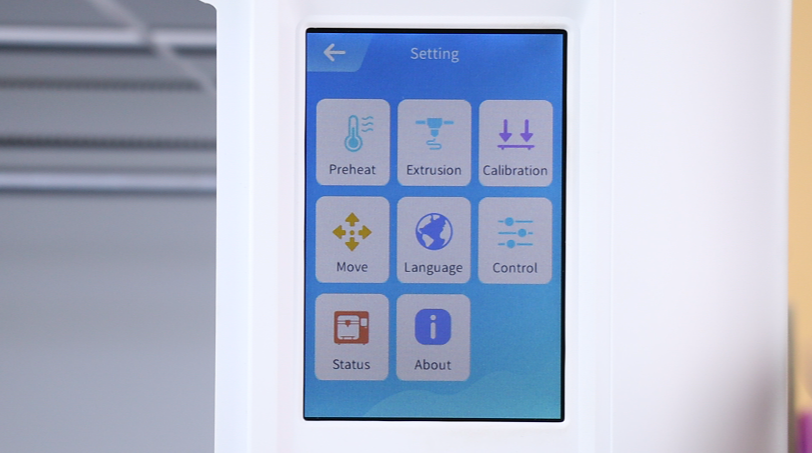
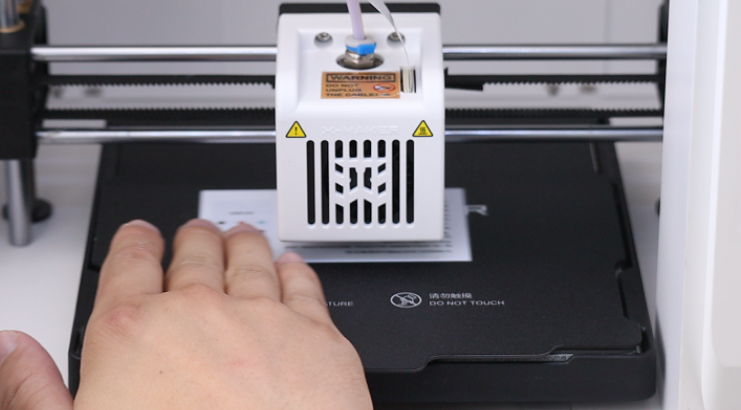
| 4. Take out the leveling card that comes with the printer. | 5. Place the leveling card in the center of the bed. | 6. Press Setting on the display. |
 |
 |
 |
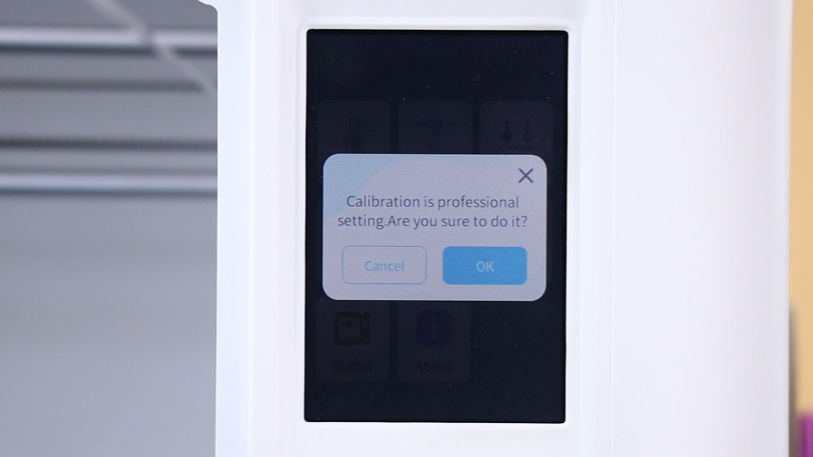
| 7. Press Calibration. | 8. Press OK on the pop-up message. | 9. The printhead will automatically start locating. |
 |
 |
 |
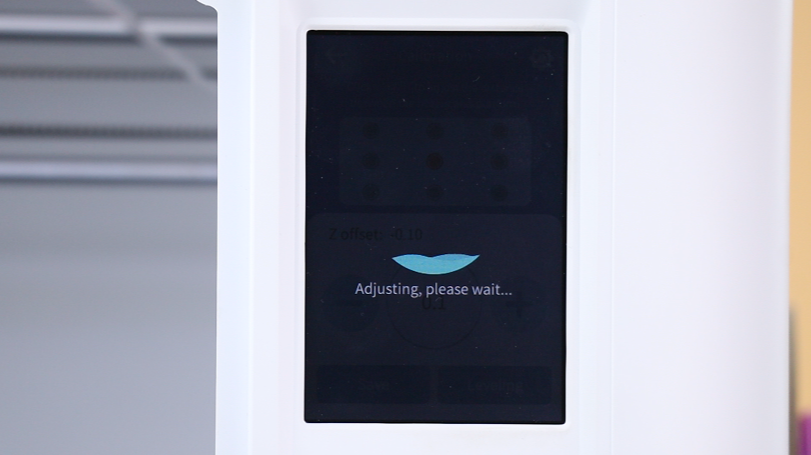
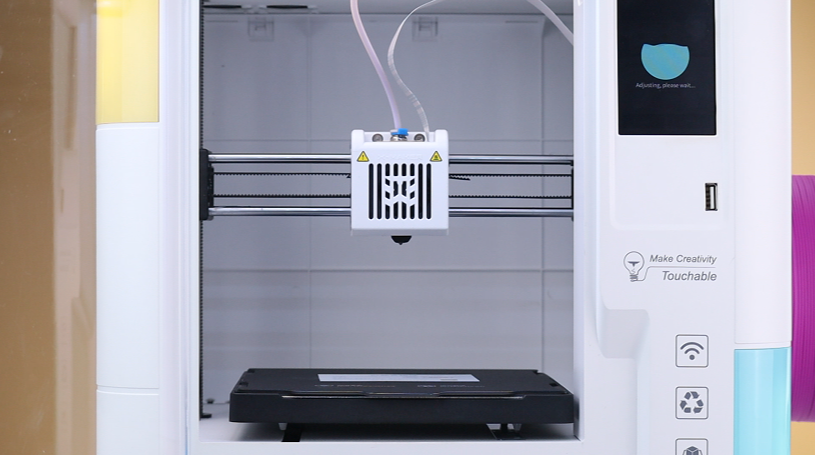
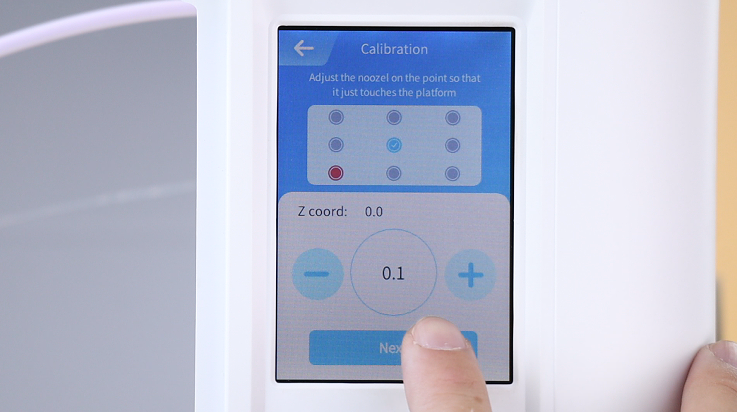
| 10. Wait for the printer to finish locating. | 11. Once locating is complete, the calibration page will be displayed. | 12. Move the leveling card back and forth to feel the distance between the nozzle and the bed. |
 |
 |
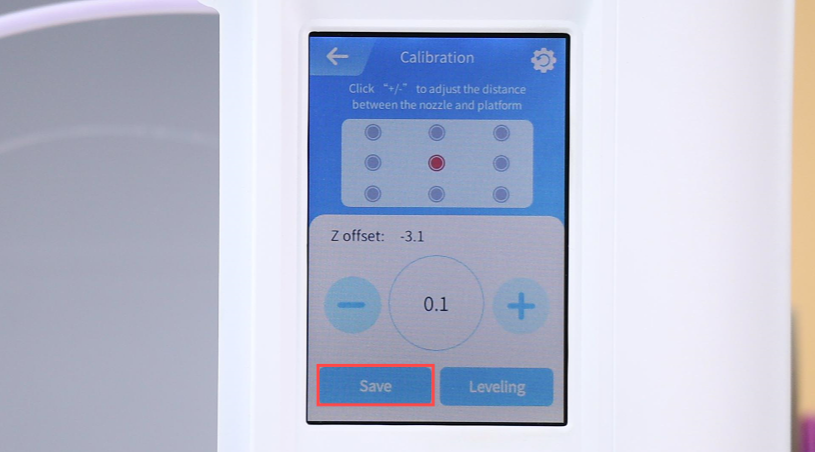 |
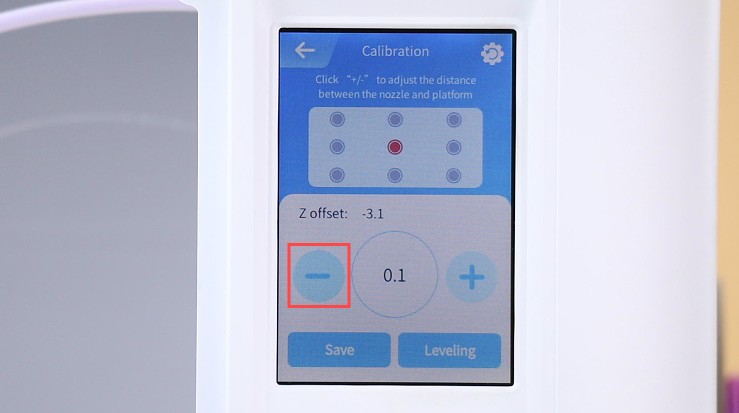
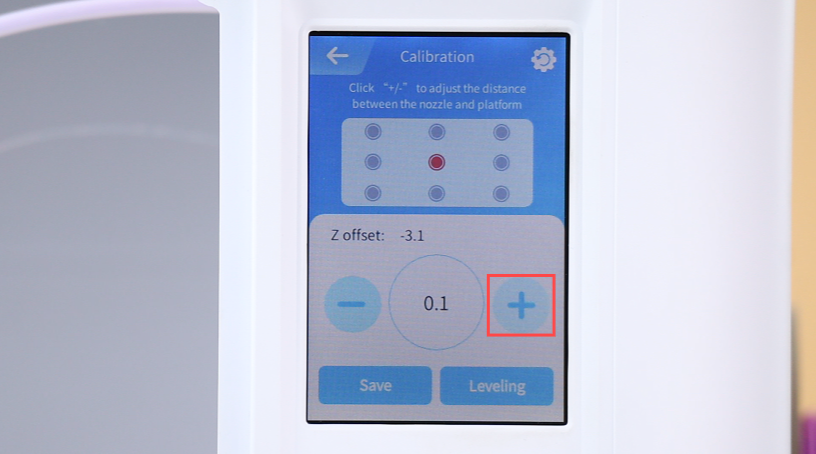
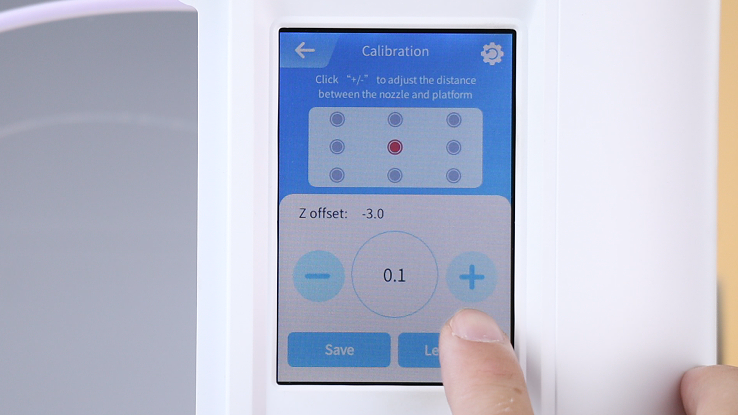
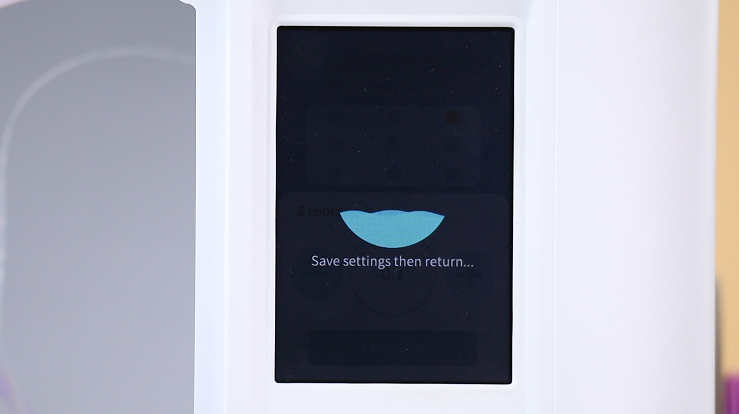
| 13. If you can't feel the nozzle rubbing leveling card, it means that the distance between the nozzle and the bed is too large. Press ➖ to lower the nozzle. | 14. If you feel that the nozzle is pressing hard against the leveling card hard, the distance between the nozzle and the bed is too small。Press ➕ to raise the nozzle. | 15. When you feel that the nozzle gently rubs the leveling card without affecting its movement, the distance is just right. Press Save. |
 |
 |
|
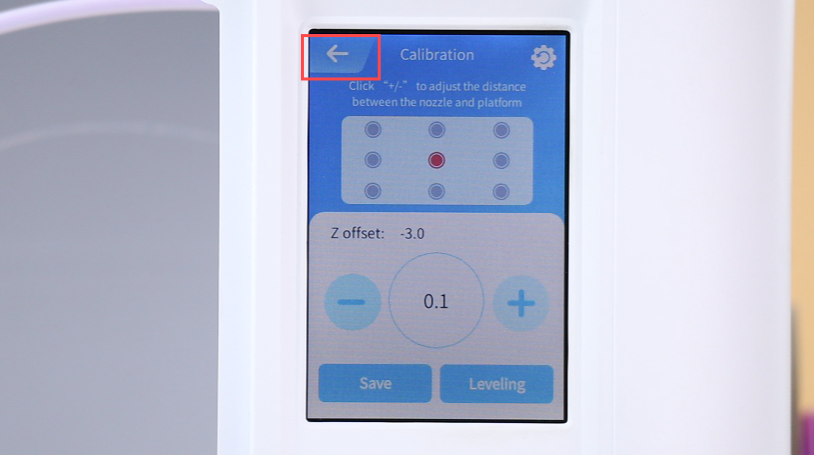
| 16. The current Z-axis deviation is saved to the printer. | 17. Press the back button on the display to return, and the printer will reset. | 18. Finally, take out the leveling card and you can starting printing again. |
¶ Leveling
The nine-point leveling function ensures that the print bed maintains a suitable distance from the nozzle at multiple positions, ensuring good interlayer bonding and overall flatness of the prints.
|
|
 |
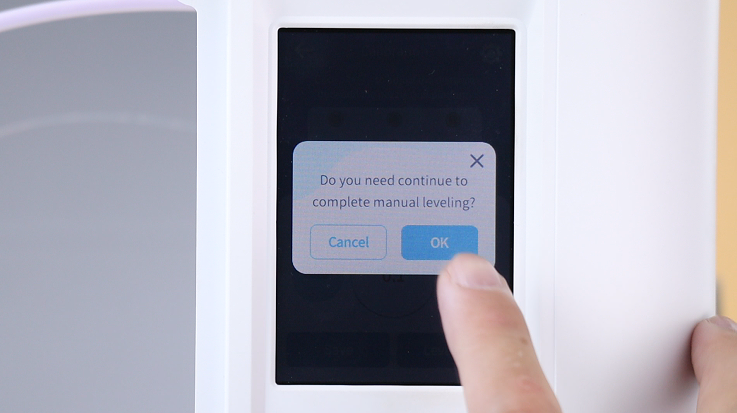 |
| 1. Calibration is required before leveling. | 2. Once calibration is complete, press Level. | 3. Press OK in the pop-up message. |
|
|
 |
 |
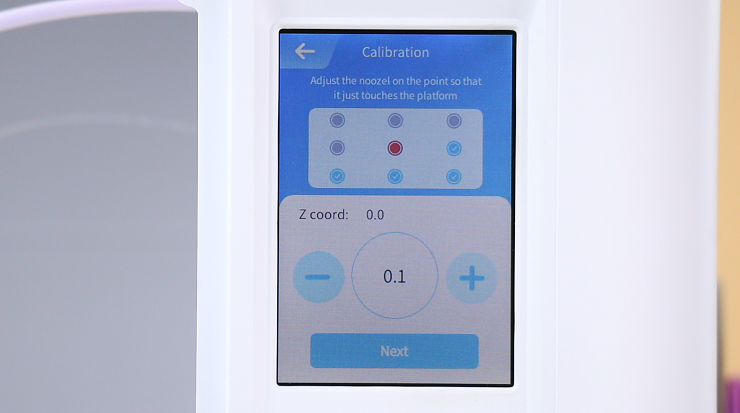
| 4. Wait for the printhead to finish locating. | 5. Use a leveling card to level the first point. The method is the same as in calibration. | 6. Wait for around 1 second for leveling each point. Press Next after leveling the first point, then level the next point. |
 |
 |
 |
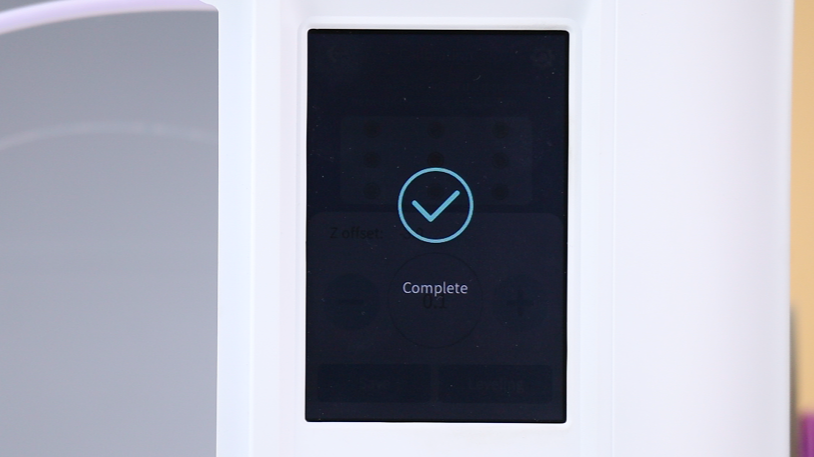
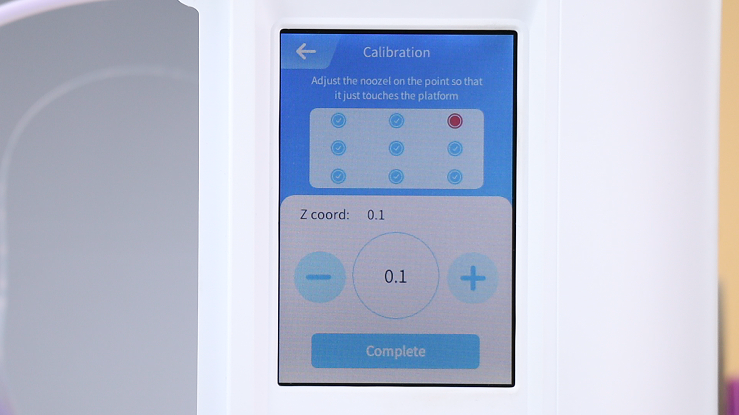
| 7. The middle point is the calibration point. Press Next to skip. | 8. After leveling the other 8 points, press Complete. | 9. The printhead will automatically return to its position, indicating successful leveling. |
Have more questions? Submit a request.