The X-MAKER JOY AI+ can connect to a network via Wi-Fi. Connecting the printer to the network will allow you to manage the printer and printing.
To connect your printer to a wireless network, you will need a smartphone or tablet. Follow the steps and pop-ups to connect the printer to your local Wi-Fi network.
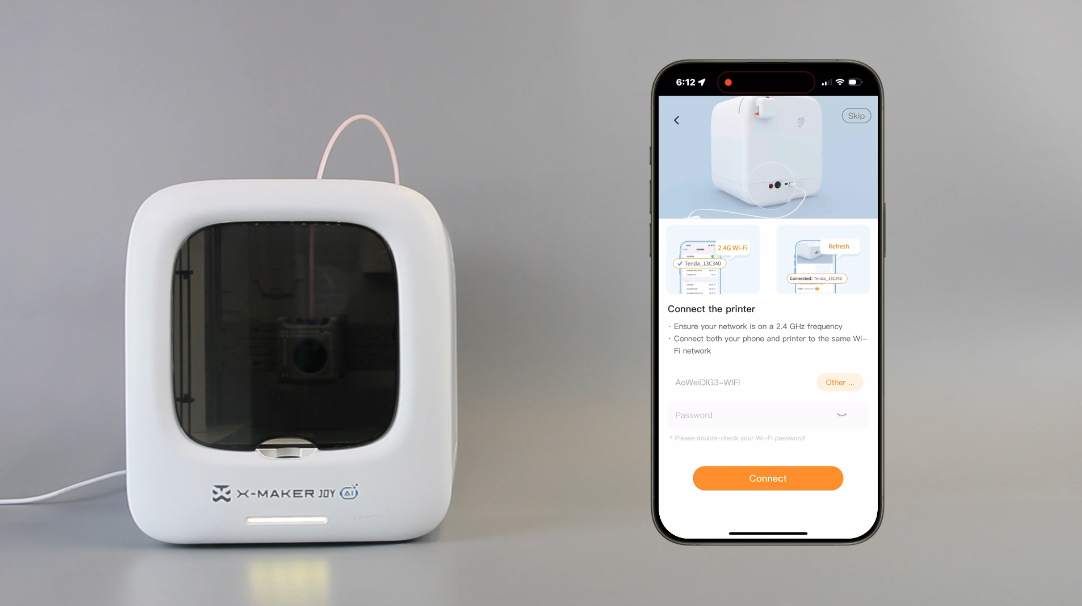
Note: Your network must be operating on a 2.4GHz frequency. If you have a dual-band router, you will have to isolate the 2.4GHz frequency (It is recommended that you contact the router after-sales support for help).
 |
 |
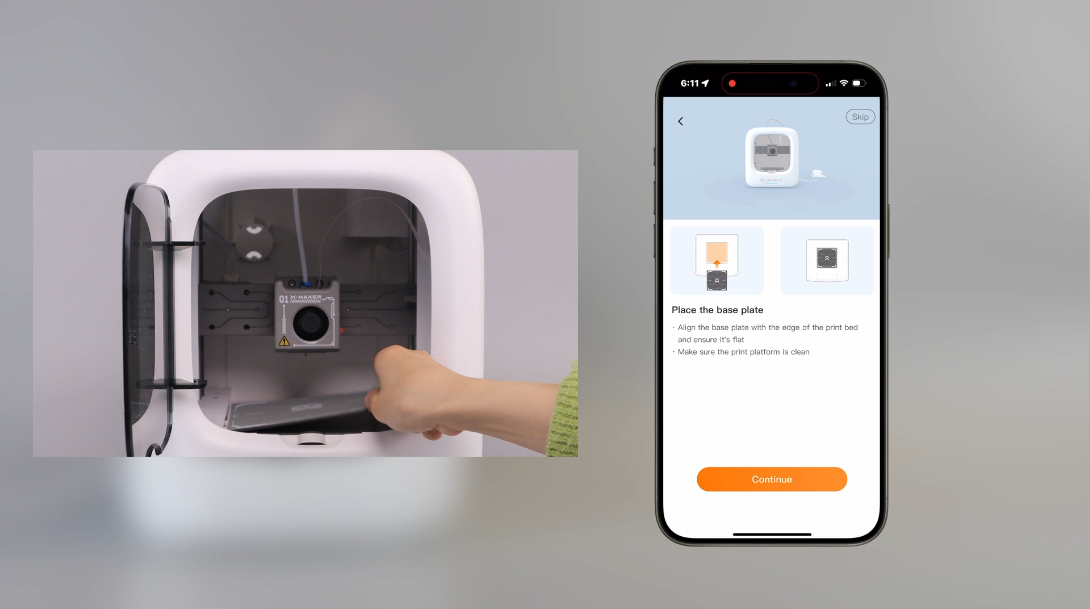 |
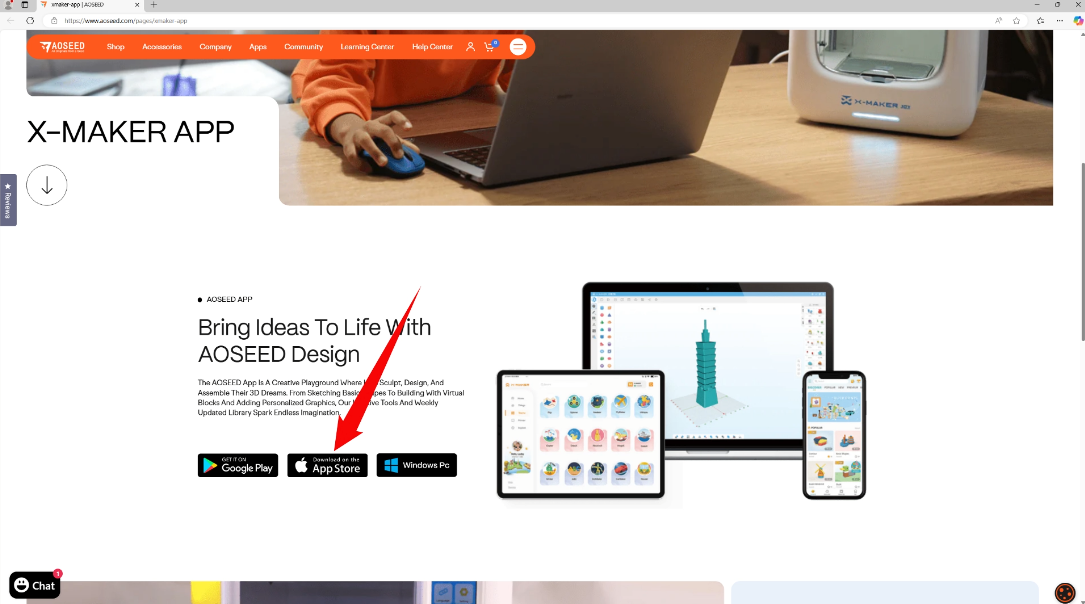
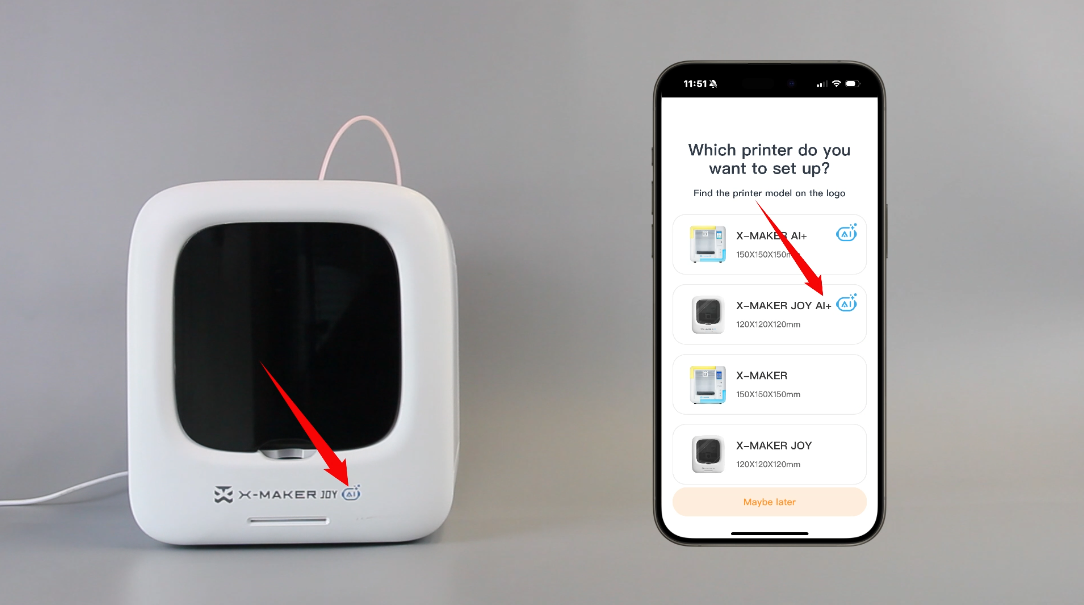
| 1. For phones, download the orange XMAKER app; for tablets, download the orange XMAKER HD app. | 2. Open the App and select X-MAKER JOY. | 3. Place the base plate (this step was completed earlier). Tap Continue. |
 |
 |
 |
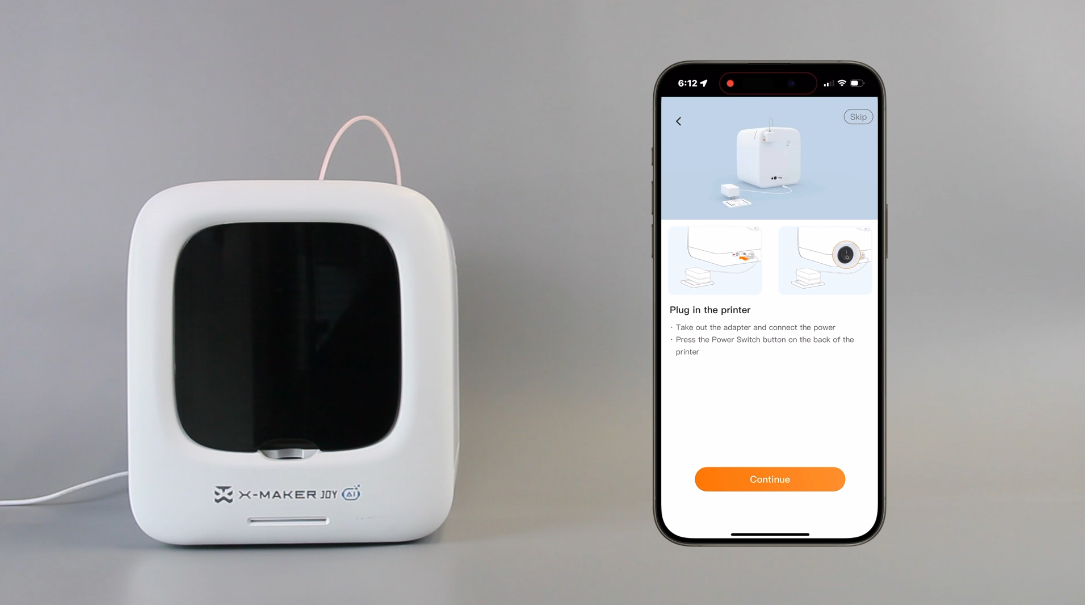
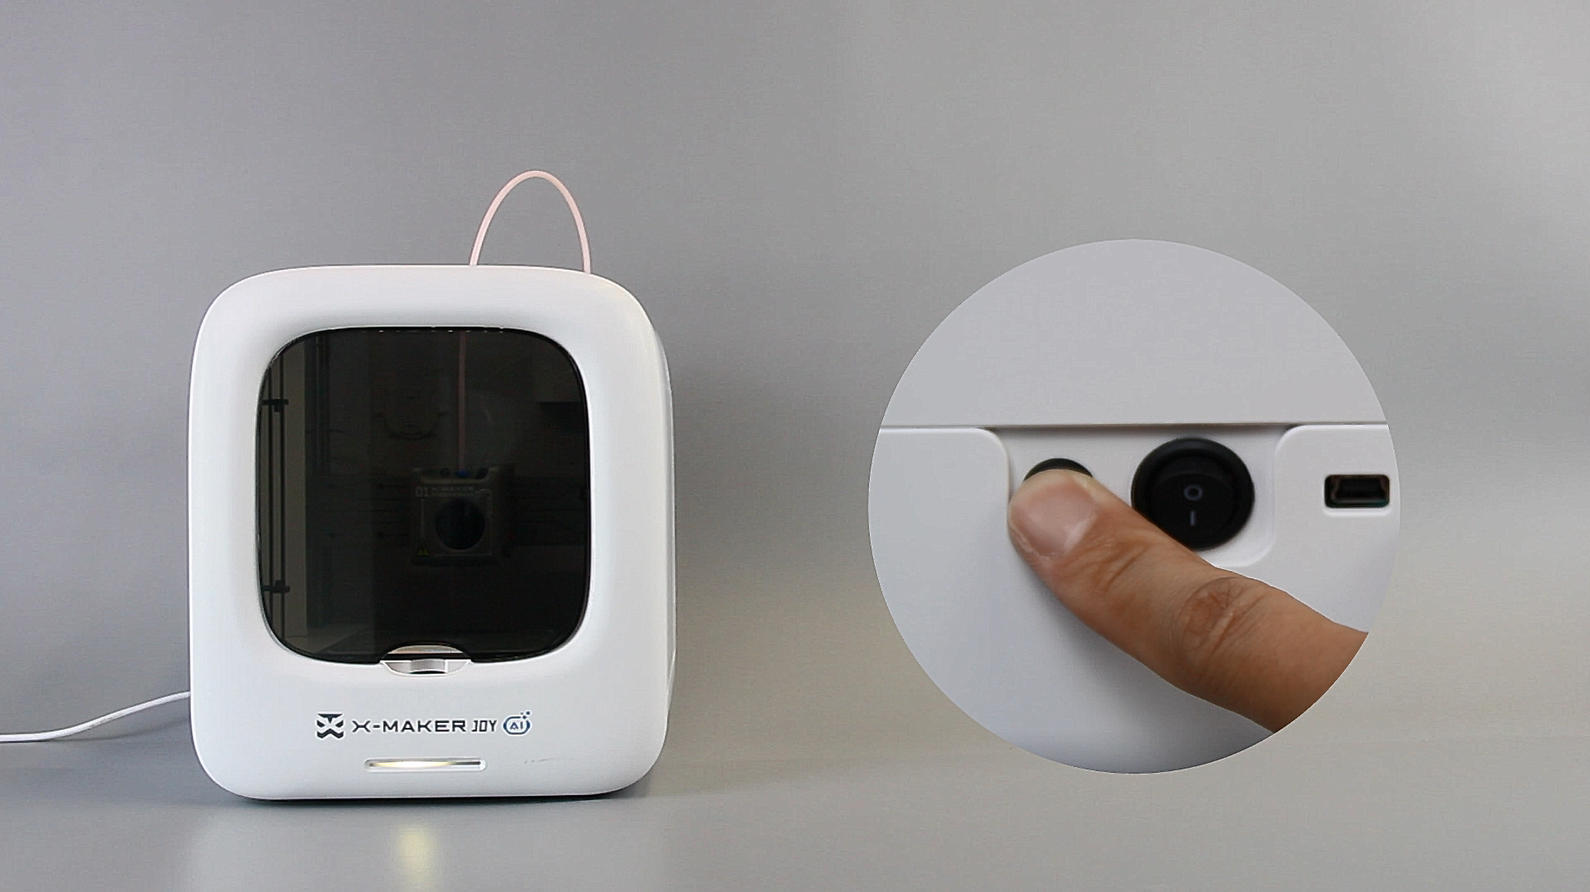
| 4. Connect the power (this step was completed earlier). Tap Continue. | 5. Turn on the printer using the power switch at the back. |
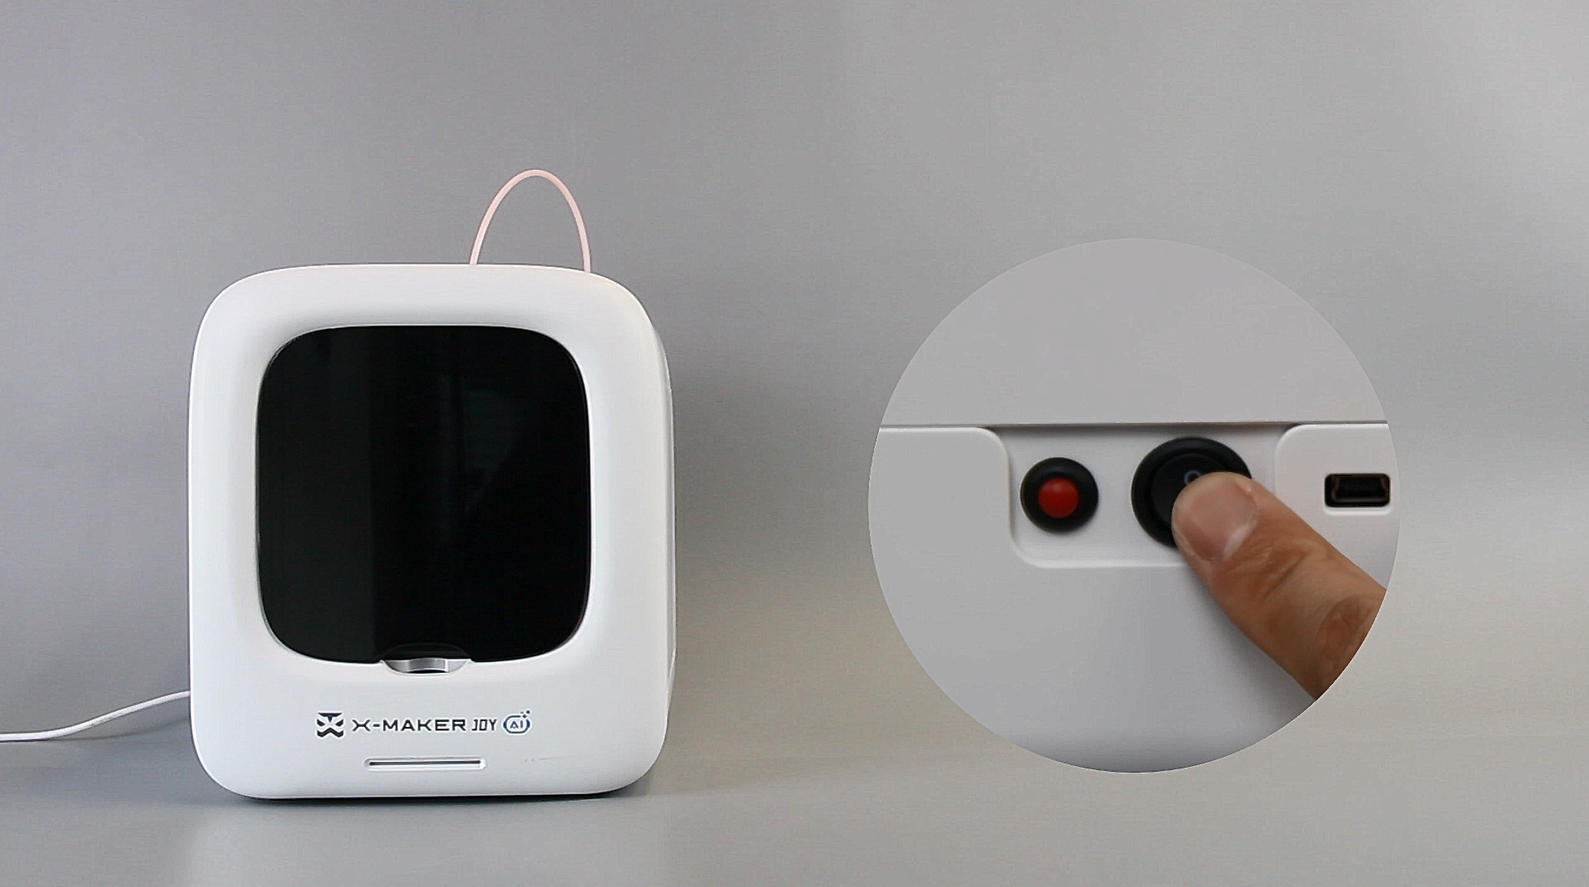
6. Reset the printer by following the steps blow.
|
 |
 |
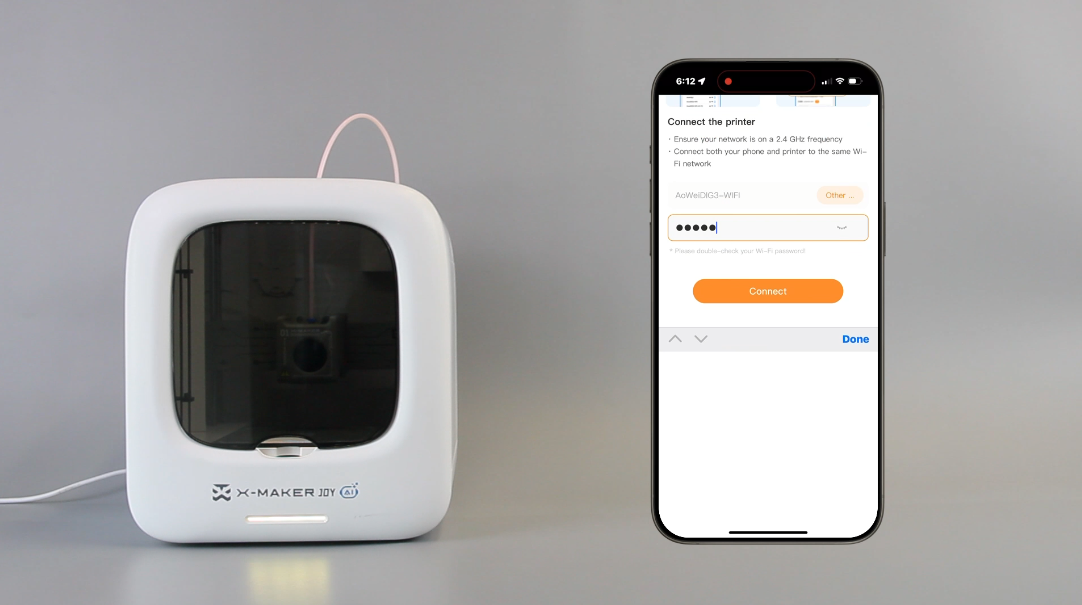 |
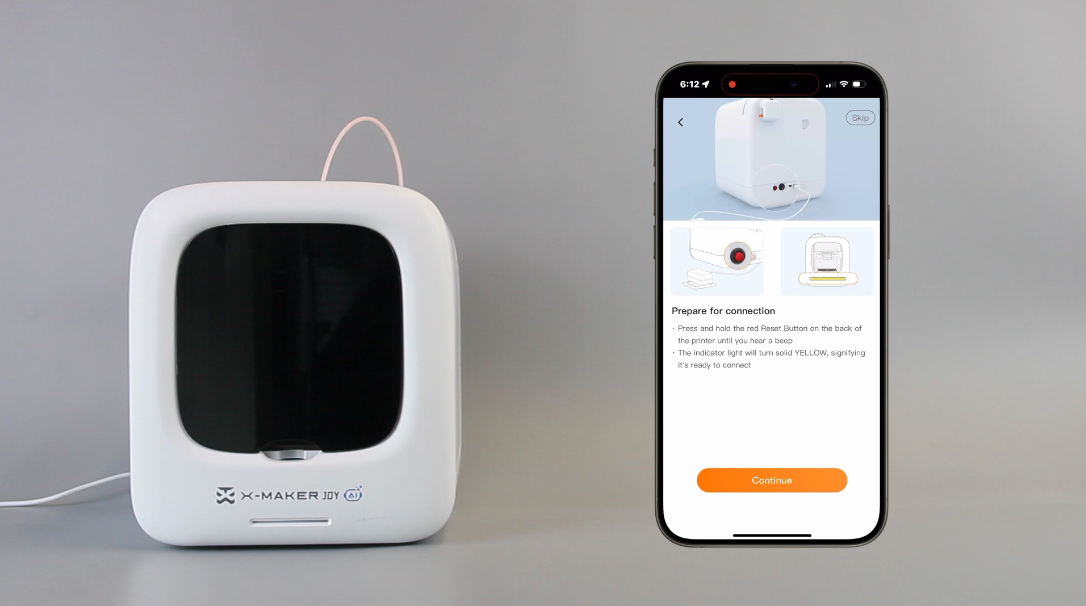
| 7. Press and hold the red Reset Button (located at the back near the power switch) until you hear a beep. The indicator light will flash yellow. | 8. When the indicator light turns solid yellow, the printer beeps, it indicates it’s ready to connect. | 9. Enter the Wi-Fi password and tap Connect. Double-check your Wi-Fi password to ensure it’s correct. |
 |
 |
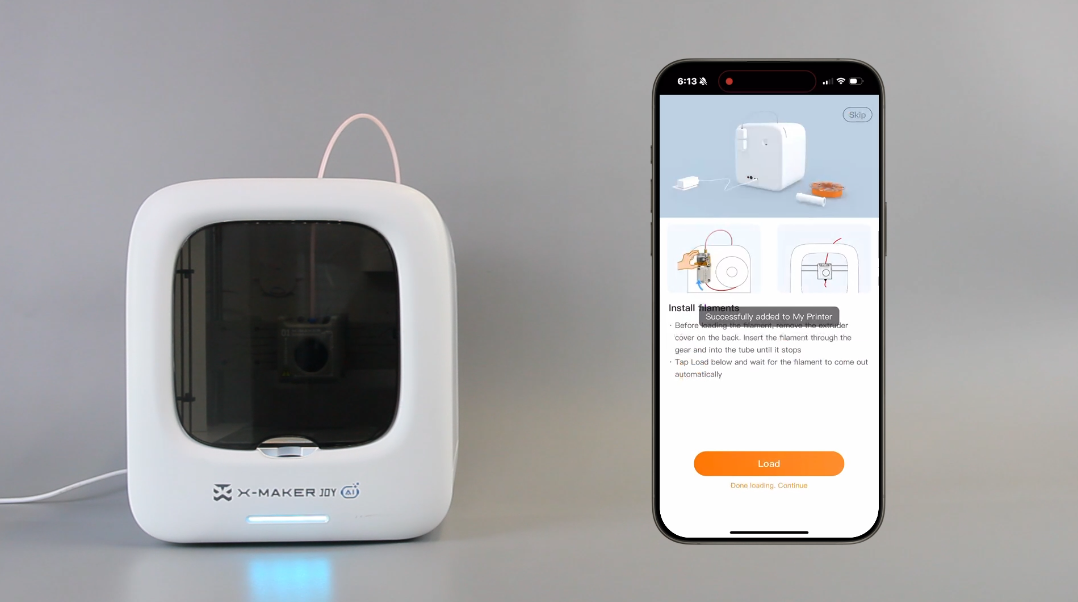 |
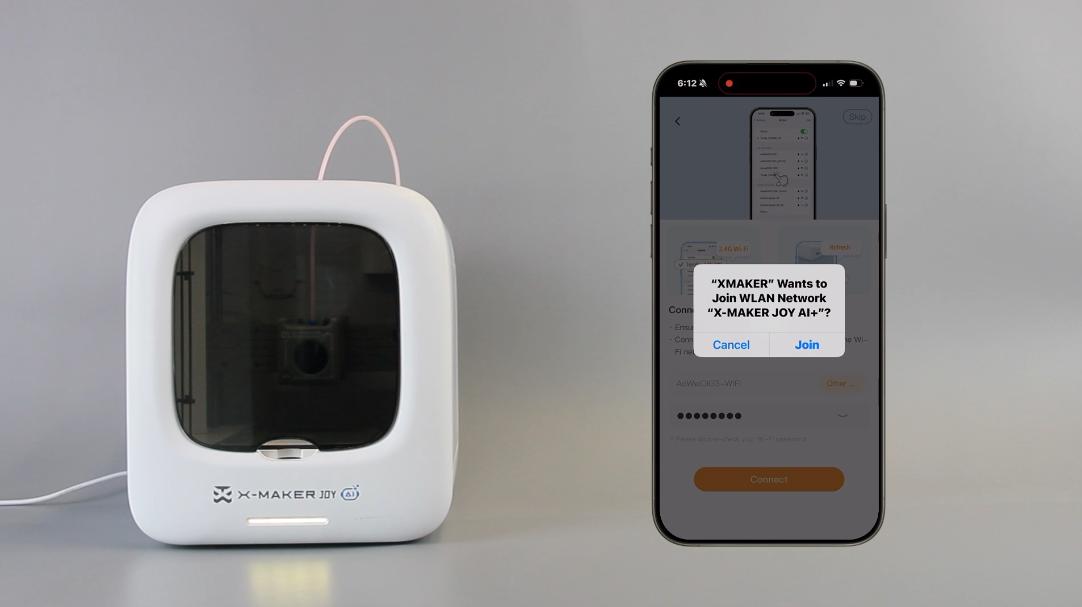
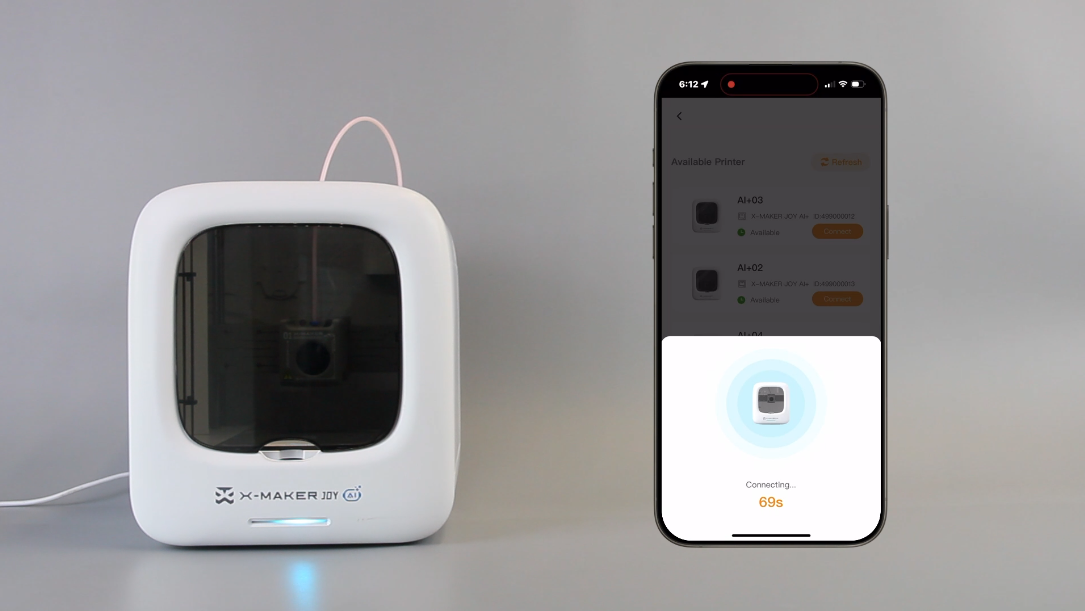
| 10. Tap Join. | 11. While the printer is connecting to the network, the indicator light will flash blue. | 12. When the network connection is successful, the light will show solid blue, and the printer will beep. A pop-up message saying “Connected successfully” will appear on your device. |
Have more questions? Submit a request.
Related articles
Troubleshooting Wi-Fi Connectivity Issues